4th Grade Frenzy: 2020
Facebook Email Me Bloglovin TPT Shop Pinterest Image Map
Home About Me Shop Freebies

November 30, 2020

Benefits of Read Alouds in the Classroom

My only memory of 4th grade is listening to my teacher, Mrs. Haker, read the Little House on the Prairie series to us every day after recess. This sacred time provided a feeling of calm following the chaos of recess in the '70s. I remembered wishing that she would just keep on reading all afternoon. Today, the time after lunch and recess is still marked by beloved read-alouds in many elementary classrooms. The benefits of read-alouds are worth every minute.

read-alouds


1. Read-alouds expose students to many curriculum standards. 

A read-aloud can be used to informally discuss genre, author's purpose, literary elements, and text structure, to name a few. Rather than teaching these skills in isolation or in the context of a reading book, students can experience these ideas outside of the literacy block. 

2. Read-alouds promote the joy of reading. 

What is more endearing than hearing, "I found the same book you're reading to us!" from a student in the library. Often students will try to find the same book you are reading or books from the same author. During a read-aloud, students can simply enjoy a story with no other required tasks. 

3. Listening skills are developed.

Students are listening and visualizing the story which is a skill that can transfer to independent reading. Sometimes, students may enjoy drawing what they visualize as you read. 

4. Read-alouds help students form a common bond.

The read-aloud is a whole class activity experienced by all students. The class will always have the memory of this time together. 

5. Fluency and expression are modeled.

As students learn to read, they need to hear what smooth, fluent reading sounds like. Fluency is important for comprehension. 

6. Read-alouds spark curiosity.

When students listen to a story, they may discover a new interest. In addition, read-alouds can be selected to introduce a concept in science, social studies, or other curriculum areas. 

7. Students make connections.

Stories enable students to make connections to other books, to themselves, and to the world.

8. Read-alouds can be used as a springboard for writing activities.

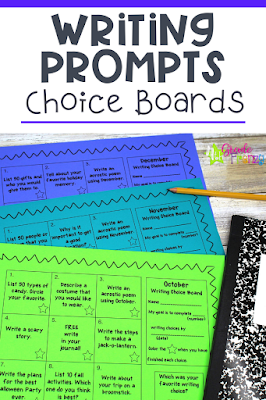
Craftivities with a theme around the read-aloud are motivating to students. There are plenty of ideas worth a look at on Pinterest or you could try these time-saving resources:


read-alouds


Need some ideas for read-alouds? Of course, it is recommended that you read the books first to make sure that they are appropriate for your students!

read-alouds


Charlotte's Web by E.B. White

Niagara Falls, or Does It?  by Henry Winkler and the rest of the Hank Zipser series

Stone Fox by John Reynolds Gardiner

A Wrinkle in Time by Madeleine L'Engle

Because of Winn Dixie by Kate DiCamillo

Holes by Louis Sachar

Charlie and the Chocolate Factory by Roald Dahl

Wonder by R. J. Palacio

Tales of a Fourth Grade Nothing by Judy Blume

The BFG by Roald Dahl


Looking to mix it up during read-aloud time? Try:

  • Poems from Where the Sidewalk Ends or Falling Up
  • Joke books for kids
  • Picture books that are just silly and seasonal 
  • Picture books to introduce a new topic 

Why not squeeze in a few minutes after lunch for a quality read-aloud? It just may be what your students remember about your class years from now!

*Please note: Fourth Grade Frenzy is not affiliated with any of these books. This post is informational only. 

Are you a subscriber yet?

FREE Activity for new subscribers:  Sign up for the Fourth Grade Frenzy newsletter!

November 9, 2020

5 Benefits of Craftivities


Crafting can be extended beyond learning the ABCs. When students make a craftivity, they are practicing skills that need attention.

1. Fine Motor Skills

Ask any middle-grade teacher who has been around for a while. Fine motor skills are less developed than in previous years. Of course, there are students still rocking the eye-hand coordination, but many teachers have seen this trend. Craftivities include practice with cutting, positioning, and gluing. 

2. Following Directions

See above for similar trends. Following multi-step directions can be especially challenging for students. Craftivities have many steps that can be grouped into chunks of directions for students to follow. For example, "Cut out the leaf, and glue it on the tree branch." 

3. Chill Time

Many students relax their minds during craftivity time. Don't be surprised if a few even start humming quietly to themselves. Soft music playing in the background is a great option during craftivity time.

4. Motivation To Write

Whether the completed projects will be hung up in the hall or at home on the fridge, students are usually asked to complete writing to go along with their project. Students have a purpose for writing and craftivities can be an engaging option for reluctant writers. Motivation increases when students prepare their writing to go along with a display project. 

5. Pride And Accomplishment 

Students love seeing their completed projects hung on a bulletin board or in the hall!


Click the pictures to view a few customer favorites!


Are you a subscriber yet?

FREE Activity for new subscribers:  Sign up for the Fourth Grade Frenzy newsletter!

Click the star to follow my TpT store! 


October 11, 2020

4 Effective Instructional Strategies That You Can Use This Week

Effective instructional strategies withstand the test of time, and even some learned in my college years remain useful. While I can be sure that Dr. Green never imagined how far technology would advance or that students would need to continue learning during a pandemic, her course introduced me to how students experience the world and learn. The best of these strategies involve giving students time to manipulate and process new information.

instructional-strategies

1. Graphic Organizers 

Graphic organizers range from Venn diagrams to timelines and can help students make connections and remember information. I once asked my class to complete a rather simple writing assignment. A student asked, "But where is our organizer?" Even though I didn't provide a writing organizer for this lesson, the students knew that this tool helped them do their best work.


2. Movement

Research shows that kinesthetic activities have many benefits to learning. When it comes to movement activities, we often think about preschool and early elementary-age students. However, movement activities continue to benefit learners at any level. One way to add movement to a lesson is to incorporate an educational brain break during a lesson. For example, in the middle of a geometry lesson, you could play Simon Says Geometry. Students use their hands and arms to show right angles, acute angles, obtuse angles, parallel lines, intersecting lines, points, lines, line segments, and rays. If you try this game with your kiddos, throw in some sillies and enjoy the laughter! 


3. The Anticipatory Set 

An anticipatory set is a set of prompts that get students ready to learn. The goal is to activate prior knowledge, build background, or make connections. An anticipatory set can be set up as a gallery walk, mystery bags, or simply a series of questions. Considered to be time-consuming, their importance is sometimes overlooked. Adding an anticipatory set to one lesson per day or a couple per week to build your library of this effective strategy would prevent overwhelm. 


4. Sorting Activities 


Young children sort physical objects by color, shape, size, etc. School-age students can sort pictures, words, phrases, and sentences into appropriate categories as they process information and build upon prior knowledge.  Sorting activities can be used for individual assignments, partner work, small group activities, or assessments. 


The art of teaching includes the selection of instructional strategies to use in each lesson. Have you incorporated any of these strategies into your lessons recently? 

Are you a subscriber yet?

FREE Activity for new subscribers:  Sign up for the Fourth Grade Frenzy newsletter!

Click the star to follow my TpT store! 


October 3, 2020

5 Virtual Field Trips Worth Checking Out

My first virtual field trip with my class was with a geologist at the University of Maine. Virtual field trips were just beginning to emerge, and as part of my district's technology grant, I was lucky enough to be a pioneer on the virtual playground. This early experience took an IT tech to set up the school's best TV in our media room. Even in this low-tech setup, the kids and I were amazed that we could connect and interact live with someone in another part of the country and become "certified" rock hounds. 

virtual-field-trips

With amazing tech advances, standards with greater rigor, and increasing opportunities, finding just the right virtual experiences for students can be overwhelming. Unlike those earlier days when only a few hundred virtual field trips were floating around, now teachers can choose experiences that match standards in any content area. 

If you are looking for virtual field trips or experiences, the sites listed below may be worth a look. To save you time, the links should take you directly to the virtual experience page of each site. As always, preview the tours and webinars to ensure they are appropriate for your students!


1. Yellowstone National Park

Topics include animals, winter adaptations, ecology, geysers, volcanoes, and the night sky to name a few.

https://www.nps.gov/yell/learn/photosmultimedia/education-videos.htm


2. The National Zoo

Live virtual events are free and require advanced sign-up. Topics include habitats, life cycles, and a zoo walk. 

https://nationalzoo.si.edu/education/virtual-programs-calendar

Check out the live animal cams! Why is that panda always sleeping and where is the elephant hiding?

https://nationalzoo.si.edu/webcams


3. Ellis Island

This virtual experience is run by Scholastic and is prerecorded. Park rangers explain the history of Ellis Island and take questions from classrooms. The virtual tour may help you meet the immigration standards in your curriculum.

https://www.nps.gov/elis/learn/education/classrooms/virtual-learning.htm


4. Museum of the American Revolution

Allow plenty of time for this one! Rather than simply viewing old stuff, this museum's virtual (and in-person) experience revolves around 4 questions that will encourage you and your students to ponder The American Revolution on a deeper level.

https://museumvirtualtour.org/


5. Access Mars

Don't skip the intro!

https://accessmars.withgoogle.com/


Please note that 4th Grade Frenzy is not affiliated with any websites or companies listed above. They are noted for informational and educational purposes to be used at your discretion. 


Are you a subscriber yet?

FREE Activity for new subscribers:  Sign up for the Fourth Grade Frenzy newsletter!

Click the star to follow my TpT store! 


September 16, 2020

A Simple Tool To Improve Learning

Timelines are graphic organizers that show information in chronological order. They are useful for displaying key ideas and will help students organize the information they read. Although social studies topics come to mind first, timelines can be useful in other subjects as well. Timelines can be used to sequence a story, list procedures in a science experiment, or steps in solving a math problem. 

graphic-organizers

Here are some benefits of using timelines in lessons: 

1. Timelines enable students to break down larger amounts of information into smaller, easier-to-comprehend bits of information. Breaking down information can promote a greater understanding of a topic. 

2. Timeline graphic organizers provide a visual representation of content. They can be helpful to visual learners, English language learners, and special needs students.

3. Timelines are useful for teaching research skills and note-taking. Elementary-grade students who are just beginning to research and take notes can use a timeline to display the most important parts of their findings. Timelines help students focus on key ideas to include when presenting research. 

How to introduce timelines to your students:

1. Show students examples. 

The examples can be timelines you find online, drawn on the board, or even made on poster board.

2. Create a timeline together. 

You can begin by creating a timeline of a typical school day. Draw a timeline format on the board and label "arrival" at the beginning of the timeline. Students can write activities and subject areas in chronological order along with corresponding times.

3. Assign independent or partner timeline research and creation. 

Be sure to assign or suggest topics that spark interest! Students can create a timeline of fun topics on bulletin board paper, poster board, or printables such as this resource:

graphic-organizers

Timelines make learning so much easier! 

Are you a subscriber yet?

FREE Activity for new subscribers:  Sign up for the Fourth Grade Frenzy newsletter!

Click the star to follow my TpT store! 


August 29, 2020

Examples of Specific Feedback for Students

General comments such as "Great Job" are nice words that may make students feel good, but specific feedback can help students advance their learning. Imagine that you are just learning to drive. After driving all over town, the instructor or your parent says, "That was pretty good, but there are some things you still need to work on," and walks away. It's important to know what exactly was good and what needs work! Students need the guidance of teachers to provide information about what is going well, and what next steps to take to move along. This guidance can be provided in the form of specific feedback. Feedback can be provided informally while walking around the room as students work or formally during a student/teacher conference. Either way, your students will likely benefit from specific feedback. 

specific-feedback


Like other effective instructional practices, providing specific feedback may take a bit of practice. You can focus on one subject area to start. Then you can add other subject areas as specific feedback becomes a habit. Here are examples of specific feedback in 5 subject areas to get you started:


1. Writing

You remembered to indent each paragraph. The next step is to use transition phrases such as "The following day..." when you begin a new paragraph. 


2. Math

You chose the right operation to begin that story problem and solved it correctly. It's a 2 part story problem so let's keep reading to decide what to do next.


3. Science

Your graph is an accurate display of your results. What conclusions can you draw based on this data?


4. Social Studies

You were able to use North, East, South, and West correctly when answering questions about the map. Now you are ready to work with the intermediate directions.


5. Reading

You were able to answer all the factual questions from the passage correctly. Rereading may help you answer those trickier open-ended questions so that your answers are supported by text evidence.


When you provide specific feedback, you recognize small steps toward a goal. Notice the reaction from the student when you give specific feedback. Confidence grows when students know exactly what to do next.  

I've been reading a lot about the importance of habits. You too? Read about making math a habit HERE!

Are you a subscriber yet?

FREE Activity for new subscribers:  Sign up for the Fourth Grade Frenzy newsletter!

Click the star to follow my TpT store! 


August 12, 2020

5 Whole Group Games That Work With Kids At Their Seats

Kids staying at their seats may not be the ideal situation. Nevertheless, adapting temporarily can give students the opportunity to play whole group games. Of course, make sure that you are able to follow all health and safety guidelines before playing these games. 

distance-learning-games


1. Bingo

Bingo can be played to reinforce many topics from vocabulary words to math facts. Consider using printed disposable bingo boards. Students can have their own set of chips that can be stored in individual Ziploc type bags or inexpensive plastic containers. Here is a FREE blank printable bingo board that students can fill in with vocabulary words that you write on the board.


2. Twenty Objects

Display 20 pictures on the board for 1 minute. For younger students, you can start with fewer objects. The pictures can be content-related. For example, if you are studying electricity, you could have 20 pictures of items that run on electricity. To play during a math lesson, you could display 20 math-related items. After 1 minute, close the display. Students then try to write down as many items as they can remember. 


3. Unpacking Grandmother's Trunk

Students pretend to be up in Grandmother's attic unpacking an imaginary trunk. One by one, students name imaginary items that are found in the trunk. Each student must list the previous students' items before adding their own. Some like to play this game using the alphabet. A game could go like this:

Student 1: I unpacked my Grandmother's trunk and found an accordion.

Student 2: I unpacked my Grandmother's trunk and found an accordion and a bike.

Student 3: I unpacked Grandmother's trunk and found an accordion, a bike, and a cake.

Let the kids be silly and see how far they can go. If you have fewer than 26 students, they can have more than one turn. If you have more than 26 students, you can have recorders who write down what is said. Another starter for playing this game is "I am packing a suitcase for vacation and I am packing..."


4. Categories

This game is played like Scattegories. Make a list of 5 to 10 categories such as animals, plants, games, names, places, books, food, etc. Choose a random letter. Students then try to write one example from each category that begins with the selected letter. For the letter "D" a student could write:

Animal - dog

Plant - dandelion

Game - dominoes

Name - Dustin

Place - Dave and Busters

Book - The Doorbell Rang

Food - donut

Categories can be related to curriculum content once the students know how to play. For example, the solar system, rocks and minerals, music, art and design, and colonial times, could be categories. Make the categories more specific for advanced play. 


5. I Have Who Has Games

I Have Who Has is a fun game for students to play while practicing various skills. The game starts with a set of cards that are NOT numbered. All of the cards in the set are distributed even if students need to get more than one card. One student will have a card that says "I have the first card. Who has..." If students are practicing math vocabulary, the first card may read "I have the first card. Who has 2 lines on the same plane that are equal distance apart and never meet?" The student who goes next would have the card that says "I have parallel lines. Who has a part of a line that stops at given endpoints?" The game continues with students listening for clues to the card that comes next. The game ends when a student has the card that reads, "I have the last card." Students like to repeat these games while being timed to see if they can beat their previous time. During times when students cannot share materials, these games can be printed on paper and disposed of after each use. Once students can share materials, the game cards can be printed and laminated for repeated use. 


Here are a few inexpensive suggestions to get started with I Have Who Has Games:

Multiplication Game 2's and 3's

Multiplication Game 3's and 4's

Multiplication Game 4's and 5's

Multiplication Game 5's and 6's


Dreaming of getting back to the future with all the things? Here are some not-so-socially-distanced games to keep in mind for later on:

Whole Group Games


Are you a subscriber yet?

FREE Activity for new subscribers:  Sign up for the Fourth Grade Frenzy newsletter!

Click the star to follow my TpT store! 


July 23, 2020

6 Models of Co-Teaching

Co-Teaching is a rewarding, yet challenging experience. Co-teachers need to plan and communicate regularly, and consideration of teaching models will be important.

co-teaching


There are 6 basic models of co-teaching to consider when planning your lessons.

1. One Teach and One Observe

One teacher teaches while the other teacher collects data. The data collected can be academic or behavioral, formal or informal. One type of data I previously asked my co-teachers to collect centered around my interaction with the students. I wanted to know how many times I called on each student during a particular lesson and whether or not they had raised their hands before being called on. This was informal data collection but helped me recognize which students needed more engagement or sharing opportunities and of course, which students had no trouble at all with class participation.

2. One Teach and One Assist

One teacher teaches while the other teacher provides individual assistance during the lesson. Basically, one teacher leads the lesson while the other walks around and helps any student who may be confused or needs additional direction.

3. Parallel Teaching

The class is divided into 2 groups (possibly based on data) and each teacher teaches a group at the same time.

4. Station Teaching

Both teachers teach in small groups, and the students rotate through stations that include meetings with the teachers. My personal favorite! If you group students into 4 groups, they can rotate around the room with 2 teacher-directed stations and 2 more independent stations. The teacher stations can be different parts of a lesson and students would visit both of your stations. Alternatively, the teacher stations could be the same and students would visit with just one of you. Students love this form of instruction (as do many administrators in my experience!) This type of teaching allows for teacher and student engagement while allowing for creativity and independence. Station teaching is perfect for incorporating those fun ideas found on Pinterest and TpT!

5. Alternative Teaching

One teacher takes a small group aside during a lesson for intense or remedial instruction. This type of model works well when you have a small group of struggling students and they cannot move on with content until they grasp certain concepts. Buyer beware though...often students who are not struggling will ask to sit at the table! How you handle this is up to you, but sometimes a student may just need a little TLC so if there is room at the table...

6. Team Teaching

Both teachers teach all the students in a whole group instruction format. Some concepts are better taught with the two of you interacting back and forth in complementary roles. This model feels like a theatrical performance and can be fun and effective. Students like to pay attention to the interaction between the adults and the adlib in the lesson. Again...buyer beware...students have been known to use this type of lesson to get you sidetracked and off-topic!


You can choose different models during the day to keep the variety and meet the needs of your students. Flexibility is important too. A lesson that begins with One Teach and One Assist may evolve into Alternative Teaching if you observe that some students need greater support.

Working with a co-teacher and need a place to start? Check out this Co-Teaching Guide that includes plenty of helpful printables:
Co-teaching

Have you used any of these co-teaching models? Which models have worked out the best?

Are you a subscriber yet?

FREE Activity for new subscribers:  Sign up for the Fourth Grade Frenzy newsletter!

Click the star to follow my TpT store! 


July 12, 2020

4th Grade Writing Prompts and Ideas

4th Grade curriculum usually includes 4 types of writing.

This chart summarizes expository, descriptive, persuasive, and narrative writing. It can be used as a reference and get you started with your lessons.
writing-prompts-4th-grade


Does your writing curriculum need supplements?

Kids love this Opinion Writing resource that may help with your persuasive writing goals:

opinion-writing

Here is a fun way to distribute the opinion writing prompts:
1. Place each prompt in a separate envelope. Do not seal.
2. Have students stand up.
3. Distribute one envelope to each student. Spread out the extra envelopes on a table.
4. Students look at their prompt but keep it a secret.
5. If the student wants to keep their prompt, they sit down with it.
6. If a student does not want the prompt, they may EITHER trade with a classmate or swap at the table.
7. Repeat step 6 one more time or for as long as your patience allows!
8. Students use an organizer and begin writing.


Need just a graphic organizer for your own topics? Check out this print-and-go best seller for only $1.00!

personal-narrative

Have you ever thought about having pen pals? Pen pal letter exchange can help students practice their writing skills. Check out this older post about how I teamed up with a teacher in California for a pen pal experience...    Pen Pals!

Once you team up with another teacher, you may want to use this friendly letter resource to get your kids started:

friendly-letter-writing

Choice boards are all the rage and writing is no exception! Kids and teachers love these writing choice boards that can be used throughout the school year. One teacher states: "I used this during writers workshop. The kids really loved the variety of prompts and it was easy to implement every month."

writing-prompts


Are you a subscriber yet?

FREE Activity for new subscribers:  Sign up for the Fourth Grade Frenzy newsletter!

Click the star to follow my TpT store! 


June 21, 2020

Step By Step Plan For Organizing A Pet Show

I still remember how proud I felt when I saw that blue first-place ribbon on my hampster's cage. The annual pet show at my elementary school was a time to show off our critters. Parents and guardians would arrive with our pets while we waited anxiously in our classrooms for our turn to go outside and look around. One year someone brought a horse!
pet-show

A pet show can be planned for your school, grade level, or your own class. If you will be the project planner, here are some steps that you may want to consider:

1. Get approvals from your administration, board, and local officials.

It's better to ask about what you need to do in order to be safe and compliant.

2. Decide on a day and time. 

Plan a rain date.

3. Have a conversation with the school nurse and special education staff.

Ask what suggestions they have to make the experience accessible to all children.

4. Form a committee.

A committee will allow you to delegate the remaining responsibilities.

5. Email colleagues with a save-the-date and general information. 


6. Notify parents about the event.

Parents need to be informed about how students can participate. This notice should include requirements such as proof of rabies vaccine, parent accompaniment, leashes, cages, etc.
Have students prepare their own letter home inviting parents and guardians to bring pets.

7. Make a sign-up sheet or schedule for visiting the pet show.


8. Make a map of the pet show area.


9. Make and print out certificates. 

Certificates are included in the resource below!

10. Obtain tables, cones, shade tents, and other equipment.


11. Obtain extra water to have on hand for pets.


12. Set up a check-in station for when pets arrive.


13. Assign a staff member to take pictures.


14. Set up a voting system if students are voting for a favorite pet.


15. Enjoy the pet show!


16. Announce winners and distribute awards.


17. Thank all who made the event possible!

pet-show

Need some of the details taken care of? Grab this Pet Show Planning Guide for only $2.00!
This resource is also useful for planning a Stuffed Animal Pet Show as an alternative to live pets. It includes a printable checklist of the steps above and award certificates for both a live pet show and a stuffed animal pet show. This is a great end-of-the-year activity!

Are you a subscriber yet?

FREE Activity for new subscribers:  Sign up for the Fourth Grade Frenzy newsletter!

Click the star to follow my TpT store! 


June 6, 2020

Make Math Practice a Habit

In his book, Outliers, Malcolm Gladwell refers to the 10,000-hour rule. This rule implies that it takes roughly 10,000 hours of practice to become an expert at anything. Although there are critics, most would agree that if we look closely at experts in many fields, we will find the stepping stones along the way in the form of significant units of time spent practicing.

4th-grade-math

For students, practicing math daily can help with the retention of foundation skills even as new skills are introduced. In particular, many students seem to need significant practice with addition, subtraction, multiplication, and division algorithms. Practice can be assigned for morning work, warm-ups, take-home practice, distance learning packets, tutoring, or extra help.

Practice can take the form of copying problems off the board into a notebook, worksheets, or digital practice. Copying problems off the board will help with eye-hand coordination. Worksheets can save teachers time and offer an answer key. Finally, there are plenty of websites that offer quick practice in the form of games and interactive learning.

If you have students practice by copying a few problems off the board or by solving problems on worksheets each day, you could give students time to explain how several problems are solved. The process of explaining will further help students retain how to complete the algorithms. It is important that students who are struggling and more confident students be allowed to explain how to solve the problems. Of course, the teacher would support struggling students to be sure they were confident enough to present a solution to the class.

These 3 printable resources each provide 20 days of practice. With these worksheets, students solve just 4 problems each day, and there is plenty of space to show work. The worksheets can be alternated with writing problems on the board and digital practice for variety.
Math Practice

Daily Math Practice Fall Theme
Daily Math Practice Winter Theme
Daily Math Practice Spring Theme

Are you a subscriber yet?

FREE Activity for new subscribers:  Sign up for the Fourth Grade Frenzy newsletter!

Click the star to follow my TpT store! 


May 7, 2020

A Moment In Time

A 4th Grader at the Nickelodeon Time Capsule Ceremony would be about 28 years old today and 62 years old when the time capsule is dug up. In 1992 kids voted on what to include in that Nickelodeon time capsule. Among the items that are buried are Home Alone and Back to the Future on VHS, a Nintendo Game Boy, rollerblades, a skateboard, a piece of the Berlin Wall, a baseball, Twinkies, and a jar of Gak. The time capsule will be removed from Nickelodeon Suites Resort in Orlando on April 30, 2042.


Time capsules capture a moment in time with a collection of pop culture, current events, memorabilia, and ideas from a way of life. While some items remain timeless, others seem to be destined for extinction before the time capsule is even sealed. There is no doubt that future generations will want to learn what it was like living through this pandemic as those of us experiencing it document the events that will eventually be referred to as "back in the day."

Kids have a unique perspective and can create a time capsule to document their experiences, thoughts, and feelings. With a bit of background knowledge, kids can create a time capsule to mark this moment in time. Here are some basic steps to get the kids creating followed by a link to a unique and inexpensive printout for an easy COVID-19 Time Capsule.

1. Discuss what a time capsule is and show examples.

You could Google images of time capsules and show the kids the video of the Nickelodeon Time Capsule Ceremony on YouTube.

Nickelodeon Time Capsule Ceremony on YouTube

2. Talk about where you may have seen time capsules or participated in making one. 

If you were alive for the turn of the century, you most likely participated in one. Who remembers Y2K lol?! It seems like just yesterday that my daughter was adding a Pokeball to her silver cardboard time capsule in 1999.

3. Get a container. 

A plastic food storage container, Pringles can, or paper towel tube could work. The printable time capsule below calls for an empty toilet paper roll (no explanation necessary here!)

4. Brainstorm ideas for what should be placed in the time capsule. 

Items that are too big can be pictures. Nickelodeon used a picture of a bike.

5. Gather the items and pictures and place them in the time capsule.


6. Remember to label the time capsule with the date to be opened and store it in a safe place. 

If you choose to bury the time capsule, make sure your container is compatible and that you follow your local laws and guidelines for digging.

Want to save time and keep the kids engaged? Grab an empty toilet paper roll and this printable COVID-19 Time Capsule HERE!
COVID-19-time-capsule

Assign these to your students or make them with your own kids! 

Are you a subscriber yet?

FREE Activity for new subscribers:  Sign up for the Fourth Grade Frenzy newsletter! 

April 14, 2020

7 Benefits of Choice Boards

Choice boards come in a variety of forms and there's no limit to creativity when designing and implementing them.
choice-boards


Here are a few benefits of choice boards:

1. Choice boards are a good option for distance learning.

They can be used to assign a variety of tasks over a given time.

2. Choice boards can give students a break from screen time. 

All or some activities on a choice board can be designed to be completed without a device.

3. Choice boards are a great tool for differentiation.

Students with special needs can be assigned limited choices or specific activities if appropriate.

4. Student choice is motivating.

Students can choose the number of activities, the order, or both. They feel in charge!

5. Choice boards can be created for virtually any subject area or level.

I've created them for writing, reading, spelling, grammar, science, social studies, and math. I've seen them for health, physical education, art, music, speech, and foreign language. They can be created for use in Kindergarten through higher education. 

6. They can be created easily.

Make them as simple or as fancy as you like. Many simply start with a 3 X 3 grid. Some teachers create them with learning modalities (visual, auditory, kinesthetic) in mind. You can create them with point values. Some are made with the middle space as a free choice. Others are created so students must choose 3 in a row like Tic Tac Toe. Some choice boards are made in the form of menus and include appetizers, main courses, sides, and desserts. The possibilities are only limited by your imagination! 

7. Choice boards are fun!

Something happens when you give a kid a clipboard...


Want to try out a few before creating your own? These are popular Writing Choice Boards!

writing-prompts

This Science Choice Board covers several standards and is great for taking Science outside!
Outside Science


Oldies but Goodies:

Are you a subscriber yet?

FREE Activity for new subscribers:  Sign up for the Fourth Grade Frenzy newsletter! 

Click the star to follow my TpT store! 


March 26, 2020

How To Manage Learning Stations In Social Studies

Social Studies curriculum often does not engage students in a way that maximizes learning. However, Social Studies can be a great subject for learning stations, and students love stations!
learning-stations

The key to fitting stations into a busy schedule is to spread them out over 5 days. Students can complete one station per day for 4 days. The fifth day can be set aside for students to finish any incomplete station and finalize any work to be turned in. If all stations are complete, students can work on a packet which is explained below.

I hope you find the following steps useful in planning your learning stations!

1. Brainstorm ideas about the unit.

Make a list of possible activities that you would like for your class. Resources could come from Pinterest, Google, your own files, and any useful materials from your curriculum. Activities that work well in stations include scavenger hunts, matching, sorting, craftivities, and games.

2. From your list, choose 4 different types of activities for the unit.

For example, you might select one sorting activity, one game, one crafty activity, and one teacher-directed activity where students would meet with you.

3. Make a packet of worksheets related to your unit. 

These worksheets can include vocabulary work, research, passages, etc. The packet will be kept in students' station folders to be used if they finish a station early. That way, students always have something to do! This packet is also used on the fifth day which is a catch-up day.

4. On paper, divide your students into 4 groups that can work well together. 

Write the students' names on different color index cards under Group 1, Group 2, Group 3, Group 4.

5. Gather pocket folders to use as station folders.


6. Plan a little extra time on the first day of stations.

List the stations on the board and use a magnet to place the index cards with students' names under each station. Explain your rules and expectations for students. Distribute folders and packets. Explain that they will go to one station per day, but will eventually go to every station. Explain that the packet is to be used when they finish a station early. Finally, have students record the stations on the tracking sheets if you are using the planning resource below.

7. Ready set go!

Let students try the first station. After the first station, give students time to reflect. Ask how the station went and if they have any questions, concerns, or suggestions. Clean up and collect the folders.

Chances are when students walk in the next day, at least one student will ask, "Are we doing stations today?'"

8. Continue rotating the stations for 3 more days. 

On the fifth day, allow students to finish any station they may have missed. Collect the folders and use them for assessment as you see fit.

Are you the type of teacher who just loves to organize with printables? This resource includes printables to help you plan your learning stations. It includes a teacher brainstorming page, a schedule to keep track of the stations, a chart to list student groups, and a station tracker for students.
learning-stations

Are you a subscriber yet?

FREE Activity for new subscribers:  Sign up for the Fourth Grade Frenzy newsletter!

Click the star to follow my TpT store! 


March 7, 2020

5 Easy Ways To Celebrate Pi Day In The Elementary Grades

Why celebrate Pi Day? Because it's fun, educational, and why should the big kids have all the fun?!
pi-day

In case it's been a while since you came across the word, Pi is the ratio of a circle's circumference to its diameter. Pi is an irrational number, which means its decimal form never ends or becomes repetitive. March 14th is Pi Day because the date contains the first 3 digits of Pi: 3.14. Back in the day, Pi was just another math term to learn. Nowadays, classrooms all over the world celebrate Pi Day in many creative ways. Kids today have all the fun!

Students in 4th Grade can begin to understand Pi! Here are just a few ideas to try:

1. Read Circumference and the Dragon of Pi 

Circumference and the Dragon of Pi is written by Cindy Neuschwander, and illustrated by Wayne Geehan. It is a good introduction and includes plenty of math terms. It may go over some heads a bit, but it's a fairy tale, and that is an overlooked genre. So give it a go.

2. Challenge students to memorize as many digits of Pi as they can. 

I once had a student who memorized over 30 digits! Make the competition sweet with a Tastykake pie for a prize!

3. Get out the calculators and rulers and find the circumference of some circles. 

Find some circular objects in the classroom, complete an example together, and let students try out the formula with a partner. Measure the diameter of a circle and multiply by (Pi) 3.14 to find the circumference. Make sure the kiddos know that the circumference is approximate when multiplying the diameter times 3.14!

4. Use this lesson to make Pi posters to take home.

Pi Day Lesson

5. Finish up by making individual Pies! 

I grab those mini pie crusts and individual puddings on sale. Students spoon the pudding into the crusts with a plastic spoon and enjoy some mini pies on Pi Day!


How will you celebrate Pi Day in your classroom? 

Are you a subscriber yet?

FREE Activity for new subscribers:  Sign up for the Fourth Grade Frenzy newsletter!

Click the star to follow my TpT store  

February 23, 2020

Fractions In Real Life

Fractions can be a difficult concept for some students. However, when we begin with a concrete and relatable topic for our lesson, students are given the foundation for further learning.

fractions-4th-grade

My absolute favorite way to teach and explore fractions is to make slime with the kids! At the end of the school year, many kids say making slime is their favorite activity of the year. Allow me to share how we make slime while learning fractions!

Prepare For The Lesson


1. Choose The Recipe.

Keep student allergies in mind, and be choose a recipe with safe ingredients.
The recipe I have had success with is listed below.

2. Gather Up Materials.

For the recipe below you will need:
white school glue (one-fourth cup per student)
baking soda (a three-fourth teaspoon per student)
food coloring
contact lens solution (1.5 teaspoons per student)
plastic bowls
craft sticks for stirring
wax paper
measuring cup (one-fourth)
measuring spoons (one teaspoon, one-half teaspoon, three-fourth teaspoon)

I use 2 days to complete the slime activity.

Slime Making Day One


1. Post The Recipe.

I post this recipe on the board:

4 oz (one-half cup) white school glue
1.5 teaspoons baking soda
6 - 8 drops food coloring
3 teaspoons contact lens solution

I explain that the recipe would make enough for 2 kids, but I want each student to be able to make their own slime. "Hmmm, how can we work this out?" Some of your students are bound to come up with halving the recipe.

2. Do Some Math.

We then take the time to do the math of halving each ingredient.

Here is the recipe that we end up with:

2 oz (one-fourth cup) white school glue (We use Elmers.)
3/4 (three-fourths) teaspoon baking soda
3 - 4 drops of food coloring
1.5 (one and one half) teaspoon contact lens solution

We then go over the vocabulary word knead. Demonstrate with playdough or show a visual of dough being kneaded.

Slime Making Day 2


1. Set Up The Materials Prior To The Lesson.

It may help to measure out the glue in advance using small plastic cups. This can be done by pouring 2 ounces (one-fourth cup) of water into one cup, making a line where it stops with a sharpie, and marking the same spot on all the other cups. The lines show where to fill with glue. This way the glue can be poured up to the line without having to use a measuring cup every time.


Using a table, line up the materials like a buffet station. Students will be forming a line and taking a plastic bowl, pouring the glue, taking a popsicle (craft) stick to stir, adding baking soda, adding food coloring, and adding contact lens solution.

2. Set Expectations Rules And Give Directions.


3. Have Fun Making The Slime!


Students line up at the table forming an assembly line and follow these steps:

-Take a plastic bowl and the pre-measured one-fourth cup of glue.
-Pour the glue into the bowl. Discard the empty cup.
-Add 3/4 (three-fourths) teaspoon baking soda to the glue and stir with a craft stick.
-Add 3 - 4 drops of food coloring and stir again
-Add 1.5 (one and one-half) teaspoon contact lens solution. Stir until slime forms.
(Additional contact lens solution can be added a drop at a time if consistency is too sticky.)
-Knead on wax paper.
-Play with slime!
-Store in plastic Easter Eggs or container of choice.

Give students time to reflect on the lesson. Remind students to follow the rules of their parents/guardians for playing with slime at home and to keep it away from babies, small children, and pets!


*Note: students often ask for a copy of the slime recipe!

Extend your study of fractions with this fun printable fraction activity to reinforce multiplying fractions by whole numbers.

multiplying-fractions


What creative ways have you taught fractions in your class? 

Are you a subscriber yet?

FREE Activity for new subscribers:  Sign up for the Fourth Grade Frenzy newsletter!

Click the star to follow my TpT store!